


Earlier this year, we highlighted the importance of budgeting and planning for photography as a core part of your annual marketing plans. We examined the WHY of committing to good photography in Planning for Photography I, which highlighted older consumers’ expectation of quality and the importance of delivering emotion. Then we looked at the HOW of using imagery effectively in Planning for Photography II, exploring types of images that resonate with 50+ consumers (including retirees) and choosing stock vs. custom photography.
Now it’s time to plan the photo shoot and pick a photographer.
There are three basic steps to this process. Let’s walk through them together.
#1. Determine What You Need
Before you decide to do a photo shoot you should already have determined your goals. For many organizations that goal is to get authentic, accurately representative images that aren’t available from stock image sites. In the senior living industry that frequently means representing mature consumers doing things they enjoy doing — or perhaps aspire to do.

But that’s just the start of the conversation. There are practical and creative decisions to be made at this point that will determine your next steps.
- Will you need to shoot on location or in a studio (or both)
- What image style is best for your audience and market (real-world, lively, intimate, calm, edgy, kinetic …)
- Do the images need to represent a certain season, culture or other conditions (clothing styles, weather, lighting, etc.)
- Are the images for an advertising campaign with a specific theme and messaging, or will they become part of an image library (for use in newsletters, collateral, annual report)
- Do you have samples that show the style you are looking for (extremely helpful, even if they are for an unrelated product/market)
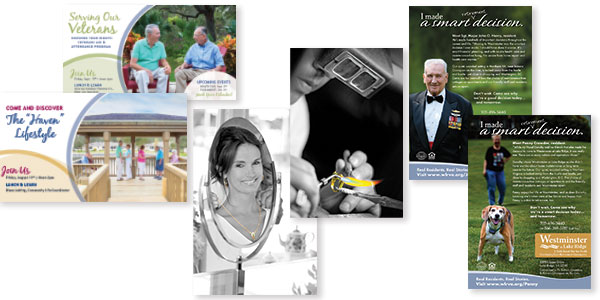
A photoshoot can be critical to effectively bringing a specific campaign theme to life. (Left to right): Capturing the Florida retirement lifestyle at Lutheran Haven; expressing the joy of receiving beautiful, custom jewelry from Quinn’s Goldsmith; and celebrating unique individuals and their reasons for choosing Westminster at Lake Ridge.
#2. Write a Creative Brief
Once you’ve explored the questions and considerations above, it’s time to put together a brief for the shoot.
Don’t skip this process. A comprehensive Creative Brief can serve as your project road map because it:
- Clearly articulates the needs and goals for the shoot
- Gives your client/management a set of expectations for signing off on the proposed approach/outcomes
- Communicates the creative vision and creates practical guidelines for your photographer (can also be used by a makeup artist and others working the shoot)
- Can include a checklist of assigned “To Dos” that will help ensure details are not overlooked
What to include:
- Goals and Objectives
- Marketing Channels (with associated technical specs for each)
- Creative Vision (and samples of desired creative style)
- Number of Final Images (and how much editing/retouching is included)
- Project Budget
- Shoot Date(s), Time(s), Location(s), On-site Contacts
- Talent Details (how many models, age, ethnicity, clothing, props)
- Image Permissions, Licensing Agreements
- Contract/Payment Terms for Photographer, Assistant, Stylist, Models

Your Creative Brief should include samples of the style/composition you are looking for and, if available, samples of ads or other materials for which the images will be used.
#3. Find Your Photographer
If your organization already has a trusted and collaborative relationship with a photographer, you are way ahead of the game. But that’s not the case for many organizations, and marketers often need to engage photographers on a project basis.
Asking colleagues for recommendations is a great way to start that search, or you can search your local area on sites such as Thumbtack and PPA.com (Professional Photographers of America).
Once you have a list of potential partners and have checked out each photographer’s website, you should have a phone conversation to determine:
- Experience — Do they have experience shooting for baby boomers and seniors? We work with photographers with experience/expertise in senior living.
- Types of photography — Editorial, lifestyle, portraiture, architectural …
- Creative style — Soft focus, sharp-edged, conceptual …
- Connections/Partners — Do they have experience working with model agencies, makeup artists and stylists?
- Pricing — Do they charge by the half-day/day or by the hour and do they charge licensing fees?
- Rapport — Is this someone who is easy to talk to, seems to understand your goals and has solutions for realizing your vision? An in-person meeting can be very helpful with this part of the process.
After these conversations, you should have a good idea of who will be a good fit for your project or your ongoing needs. Then it comes down to budget and availability. In your Creative Brief you should have outlined these requirements, so you should now be able to determine which photographer can deliver on your expectations.
The distinction between a successful and unsuccessful photo shoot is not generally evident until the images are delivered. At that point, you will either enjoy the excitement and challenge of picking from a set of strong images, or struggle with how to overcome the fact that you didn’t get what you needed.
Preparation and planning make all the difference!